After purchasing from Superhive or Gumroad, download the TerraNode_library.zip file.
Extract the TerraNode_library folder from the .zip file to a convenient location on your computer.
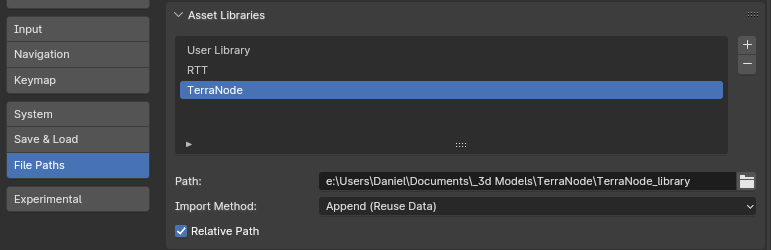
In Blender 4.0+ open the user preferences, and select the File Paths tab. In the Asset Libraries section, click the '+' to add a new library and browse to the TerraNode_library folder that you extracted from the .zip.
Once it has been added, you can double-click on the library to rename it, I prefer to remove the '_library' suffix.
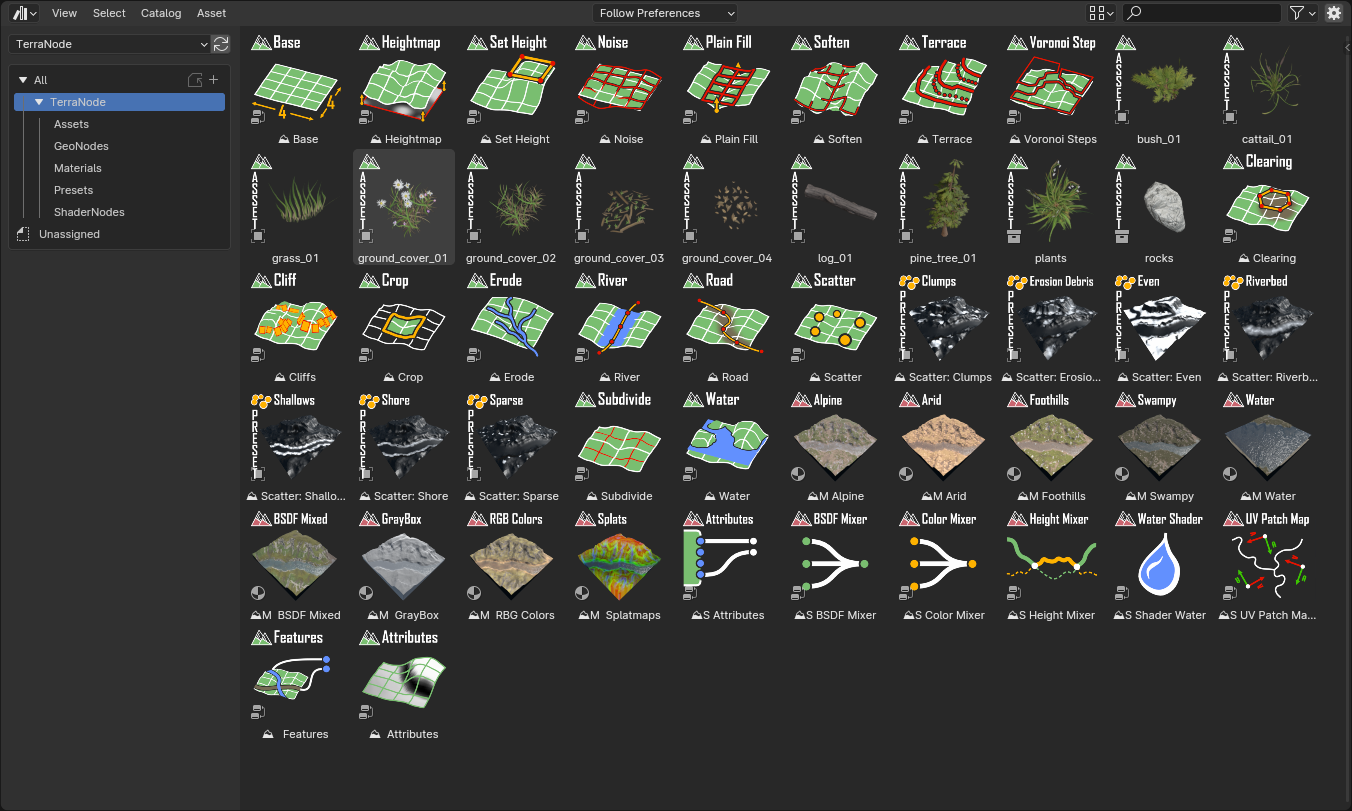
If it was installed correctly, in your asset browser, you'll find a TerraNode catalog and categorized sub-catalogs to keep all the assets organized.
The optional TerraNode addon provides a way to export terrain data from Blender as textures.
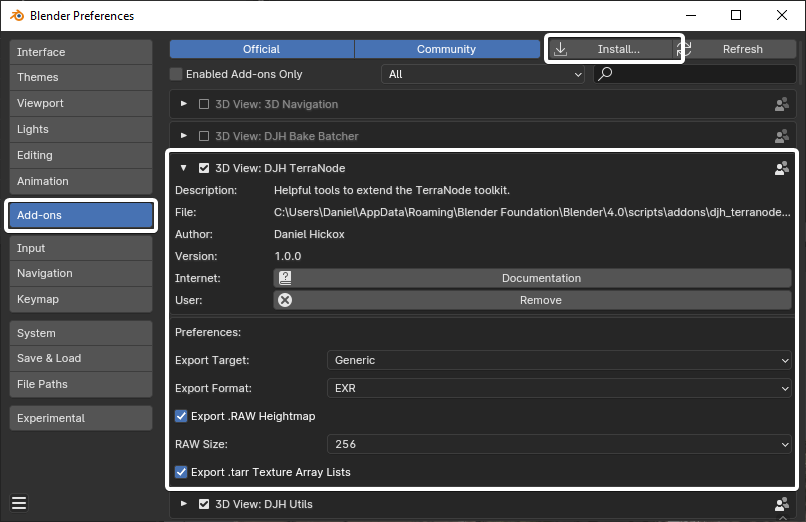
To install the addon, open the user preferences and select the Addons tab. Click the Install button and browse to and select the TerraNode_addon.zip file. Once it has been installed, enable the addon and configure the preferences according to your needs. The addon is located in the 'N' panel of the 3D Viewport.
Workflow
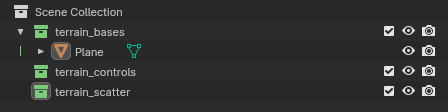
I recommend using several collections to organize the different elements of your terrain. I typically use three:
terrain_bases - contains only terrain objects with modifier stacks, starting with Terrain Base
terrain_controls - contains any guide objects that are needed to 'sculpt' the terrain
terrain_scatter - contains only objects with the Terrain Scatter modifier on them
If you organize your scene in this way, a number of Blender's default operators are very useful for quickly working on the terrain, especially if it is made from many tiles.
Select Grouped -> Collection: (Shift+G) With any terrain object selected, you can quickly select all the other objects of that type, either bases or scatterers.
Link/Transfer Data -> Copy Modifiers: (Ctrl+L) With all your terrain bases selected, you can transfer edits or modifier additions made on one base to all the others
Alt+Click on property: With multiple terrains selected, you can edit a property on all of them at once if you hold alt when clicking to edit the property. Once case where this is very useful is for toggling the visibility of the Terrain Base modifier. As your scene gets larger, you may want to do this frequently to make editing more interactive. Disabling the base modifier effectively bypasses the rest of the terrain modifiers.
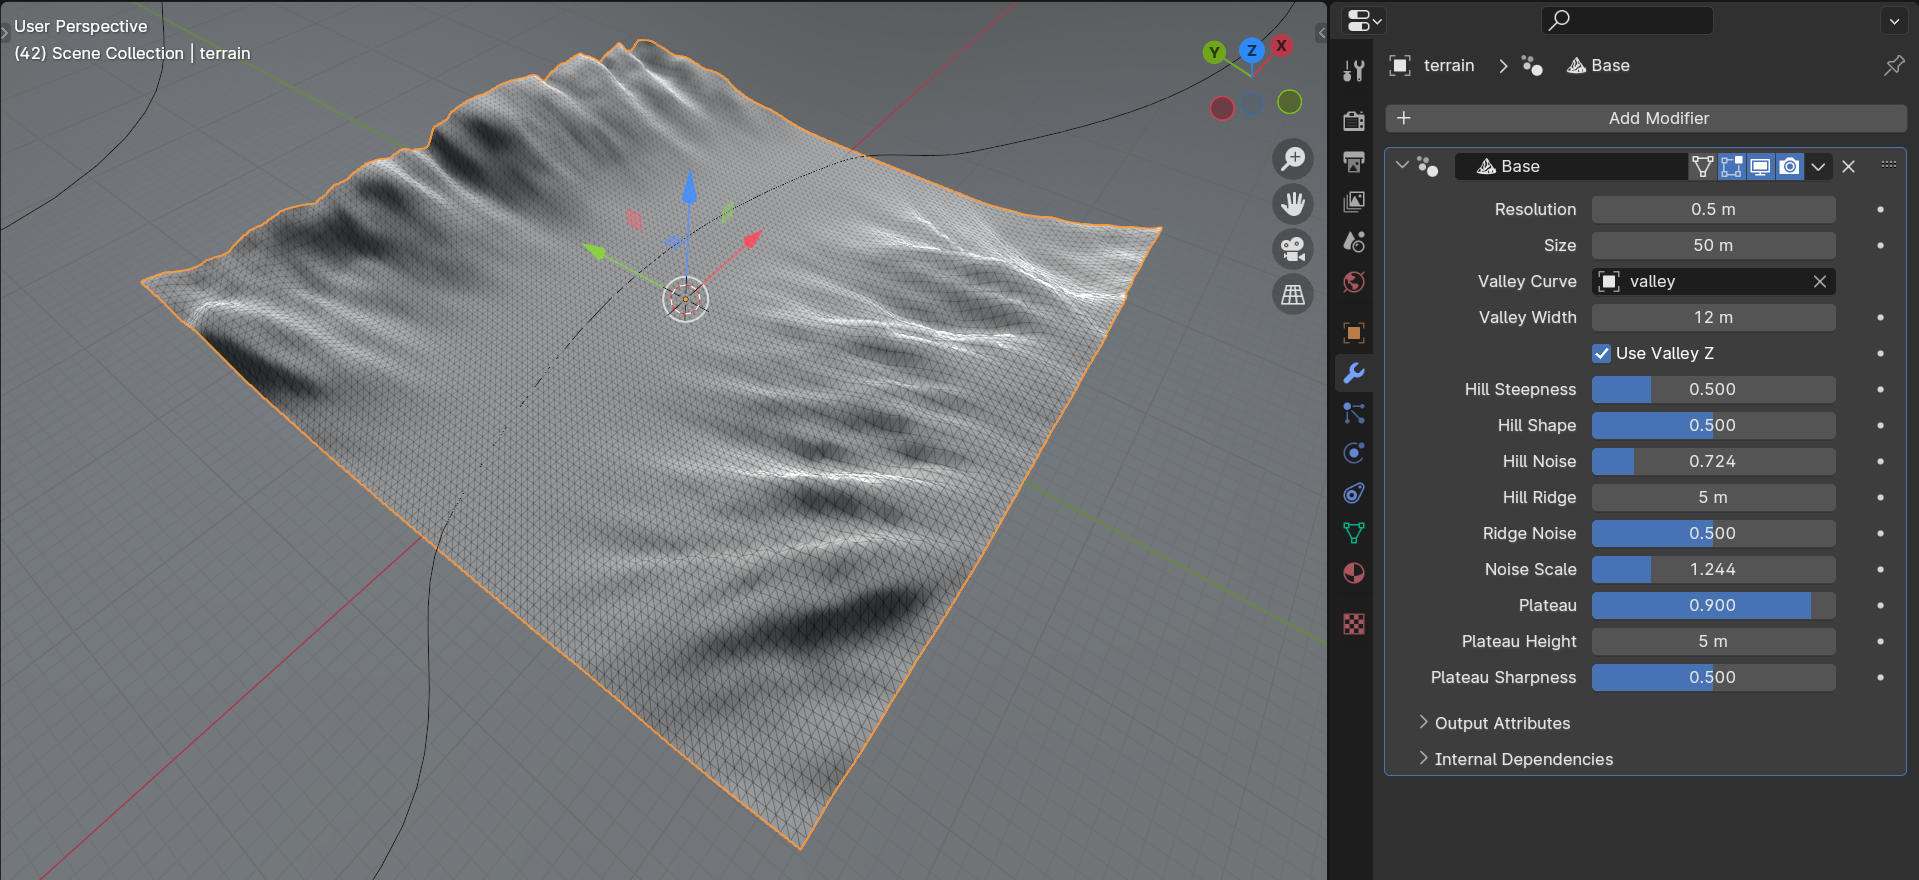
To get started designing a terrain, in your scene, add a ⛰ Base modifier to an object, a plane of similar size is a good choice. (You can add modifiers from the add modifiers menu or by dragging and dropping them from the asset browser)
(click to enlarge)
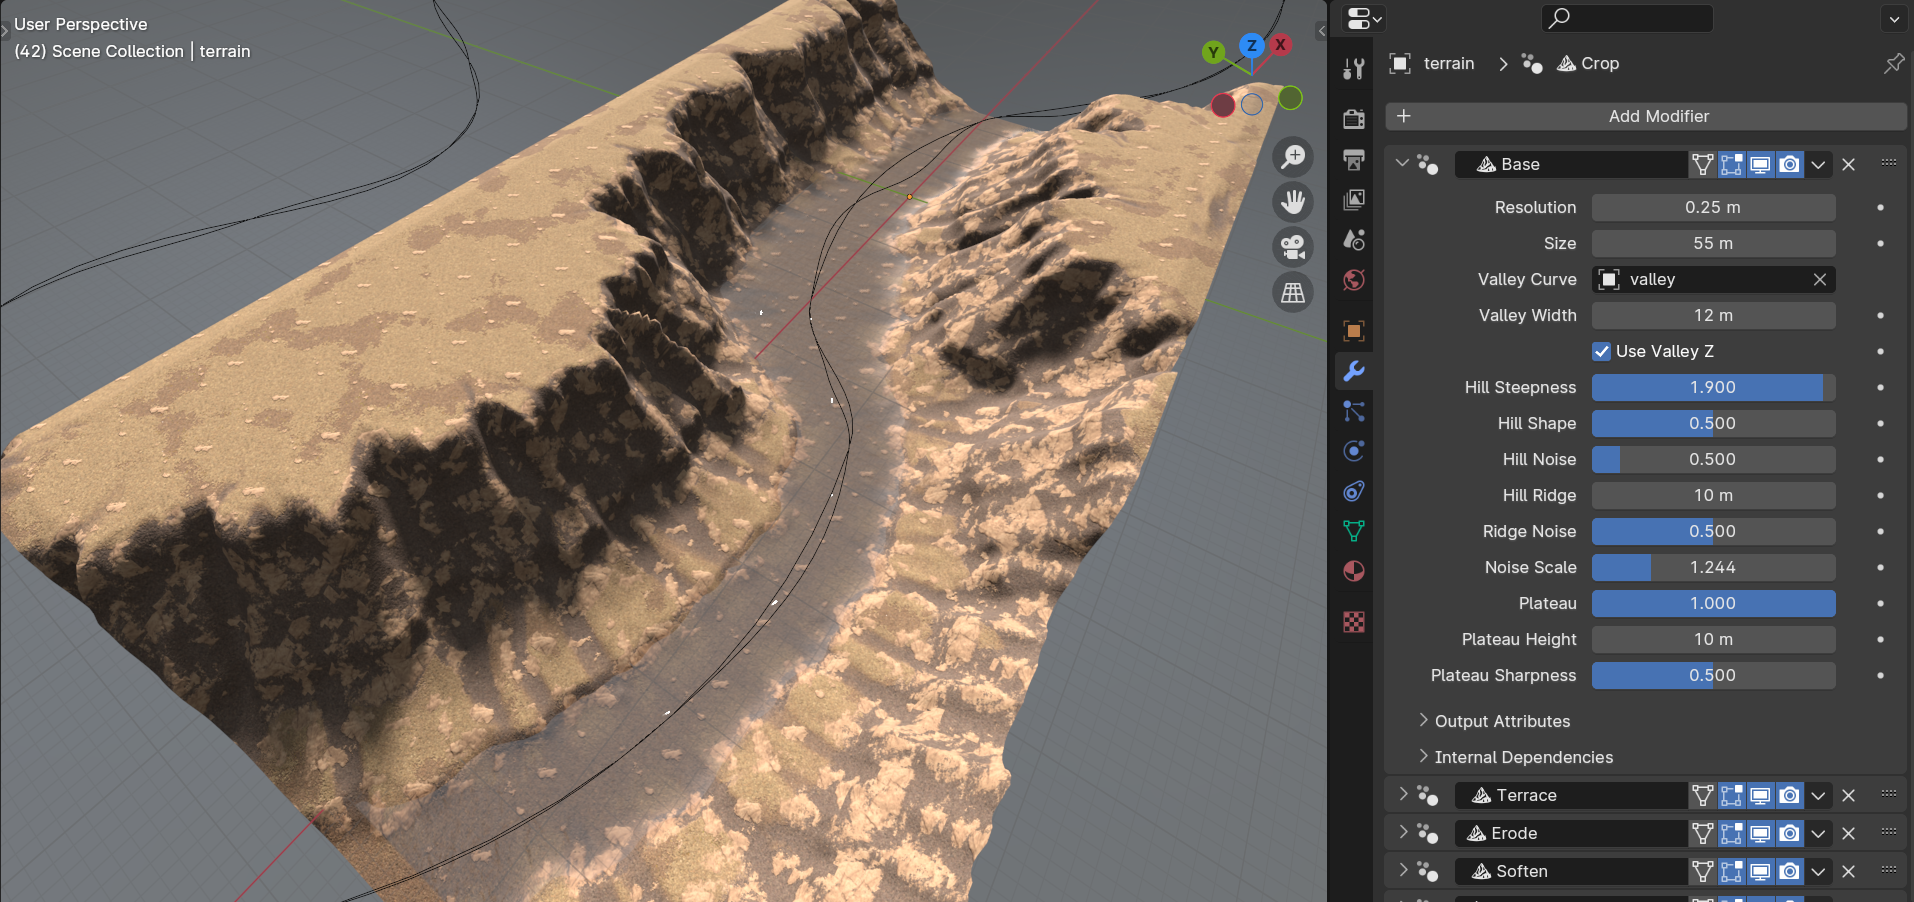
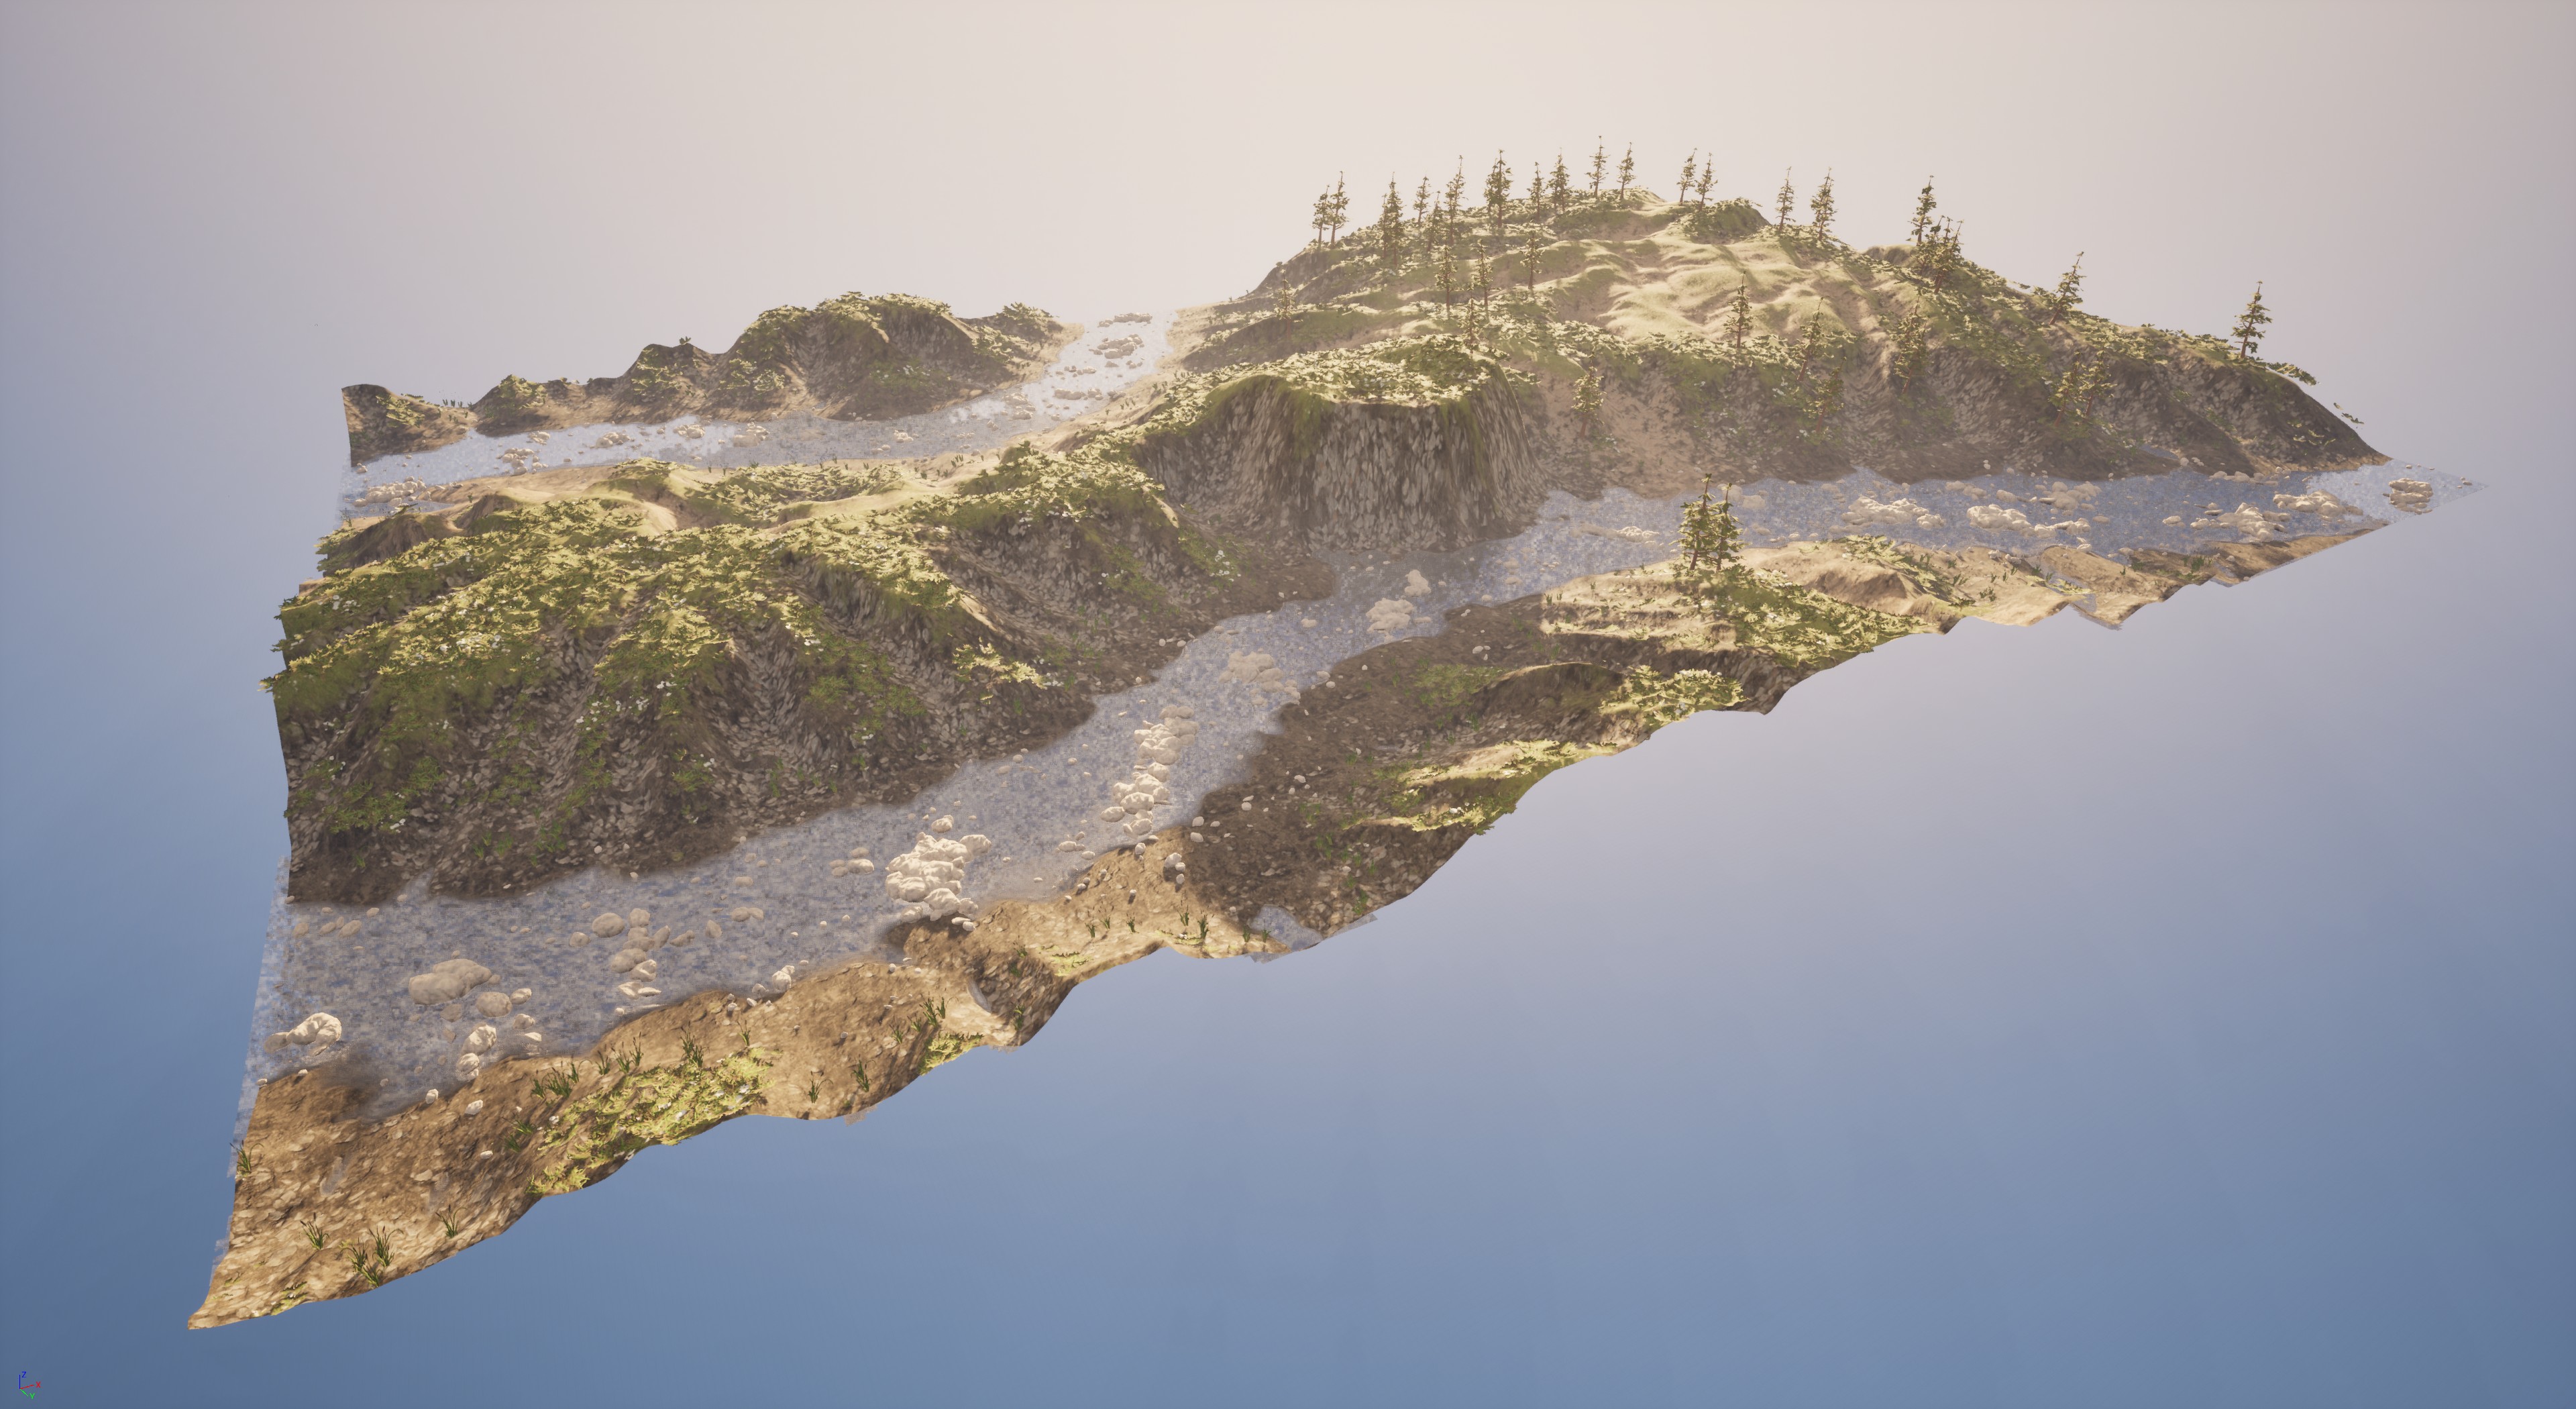
The base can either be a flat grid, to which you can add ⛰ Noise, shape it by hand with ⛰ Set Height, or you can use a guide curve to tell the terrain base where to place the bottom of valleys, this is the method pictured above. The rest of the settings (after Valley Curve) give you control over the shape of the hills on either side of the valley and how much noise/detail is added to them.
After that, just start stacking modifiers. The modifiers are roughly sorted by the order they should be added to the object. As a rule of thumb, the icons with more red in them make broad changes, and the later icons with more yellow in them make subtle changes.
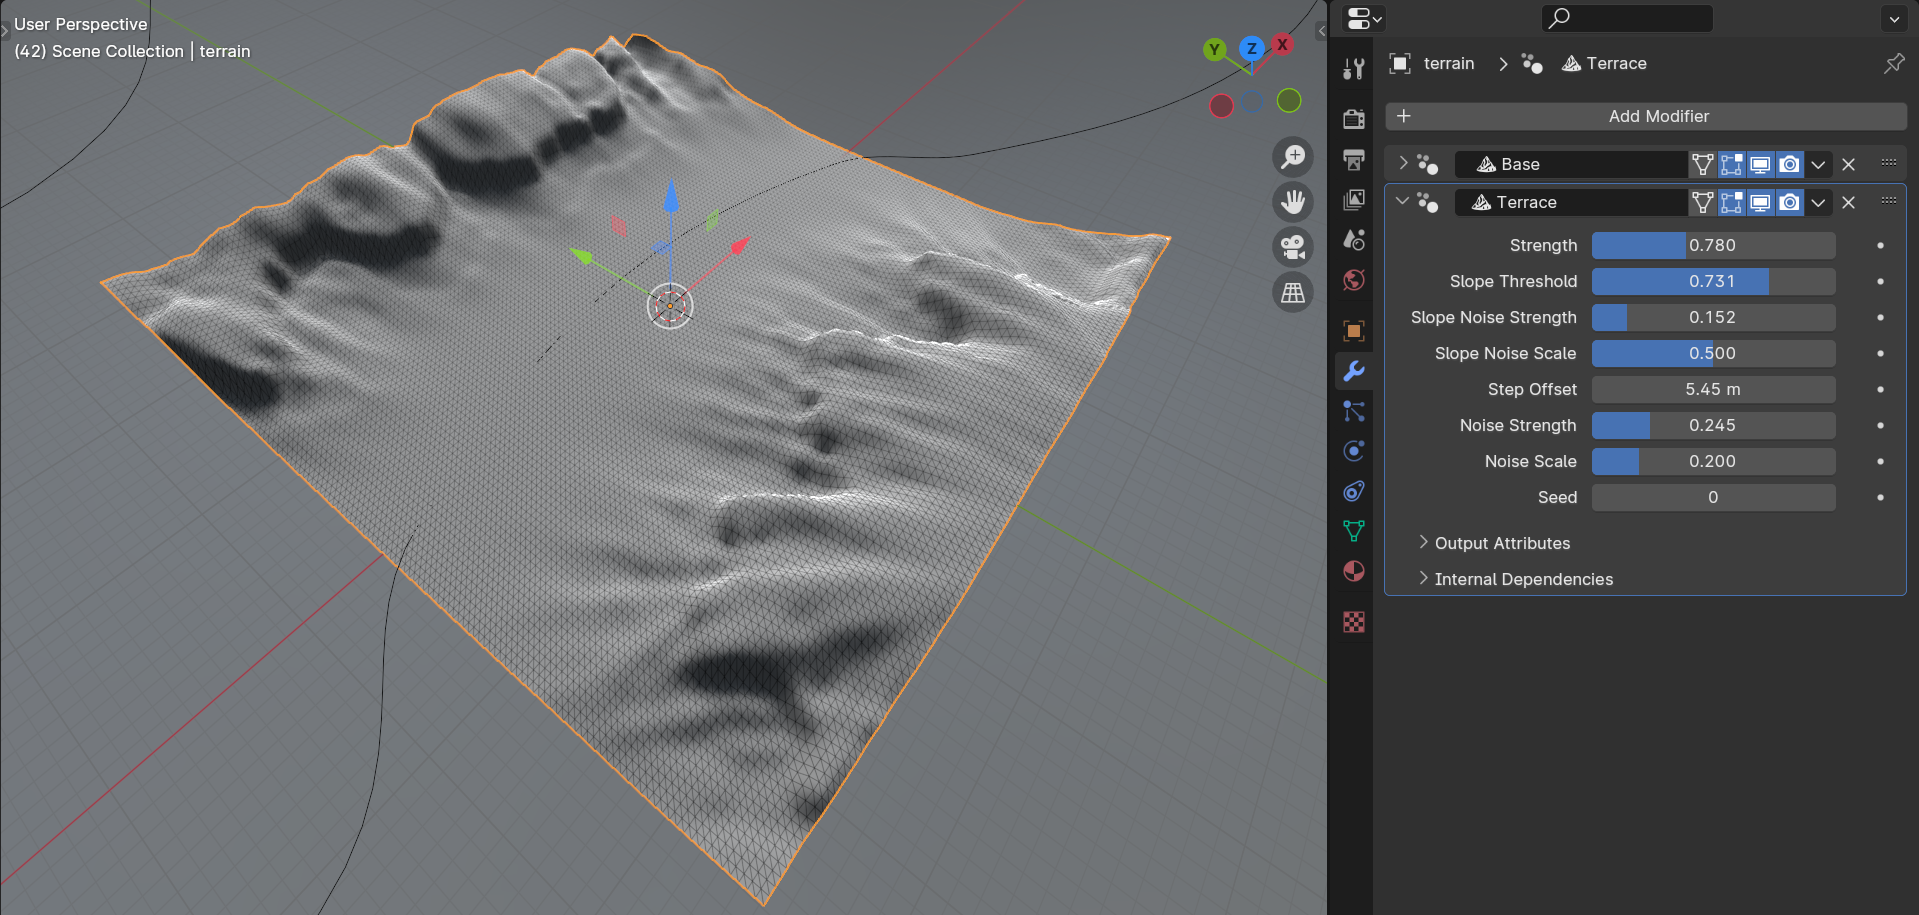
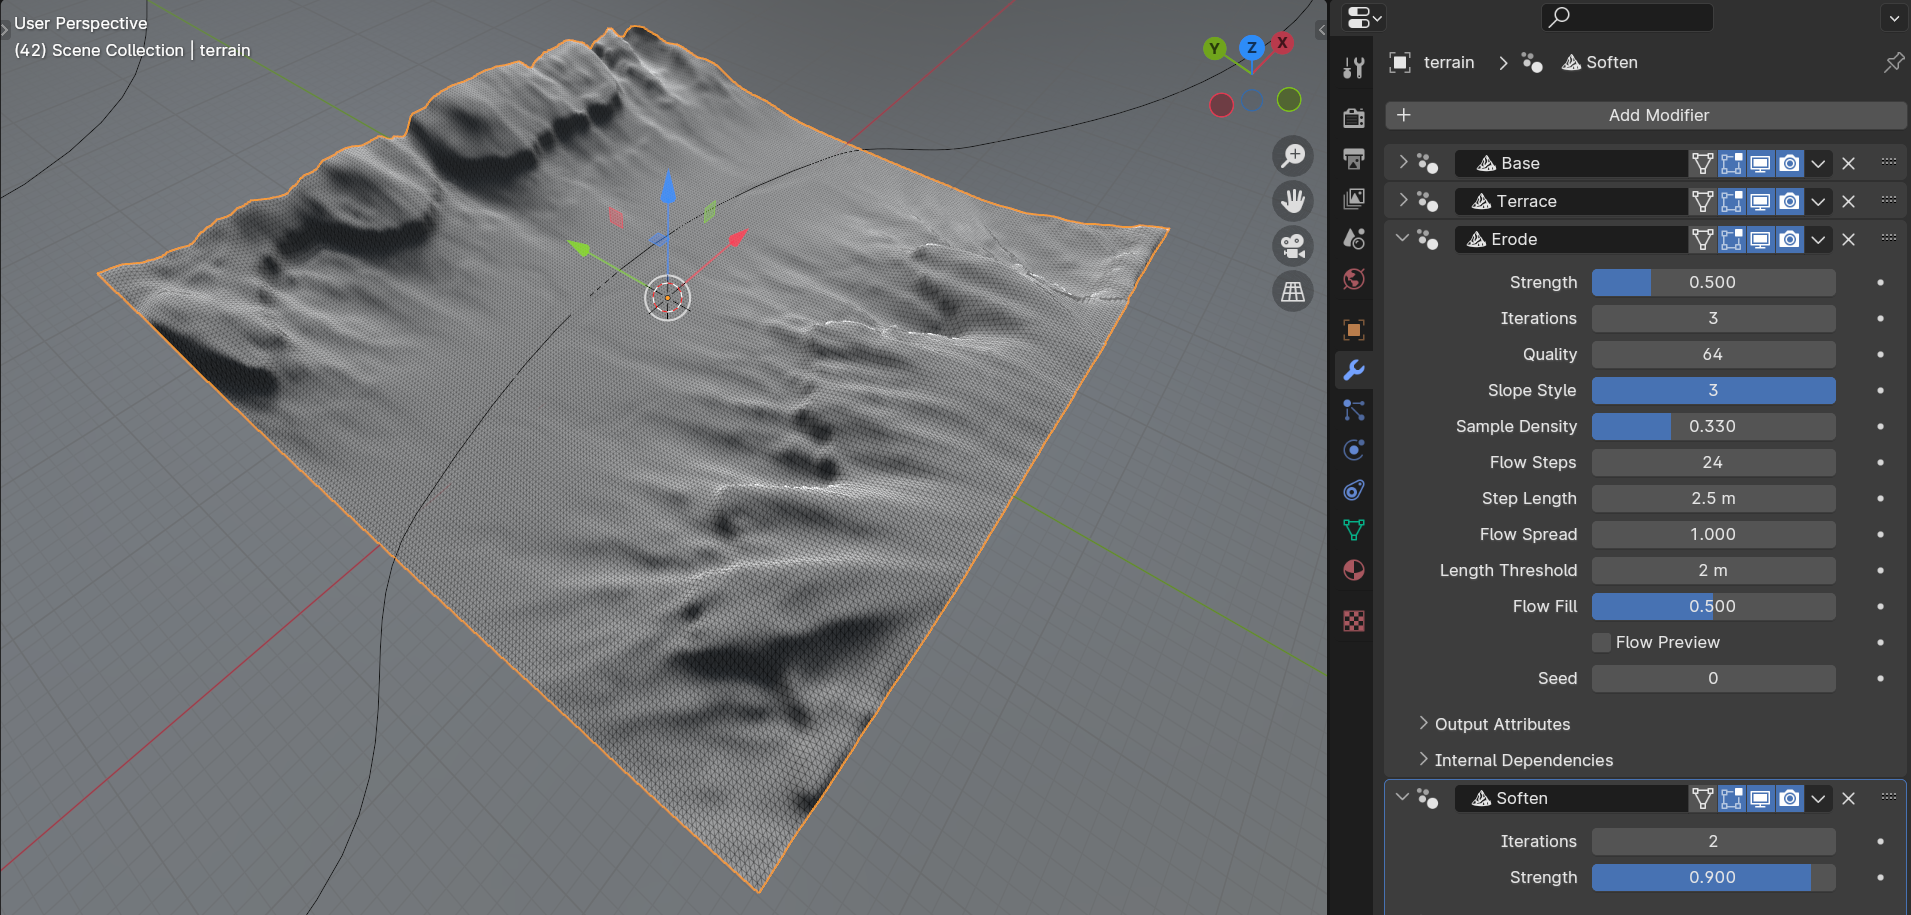
For example we could add some contrast to our river banks by adding a ⛰ Terrace modifier. Then follow that up with ⛰ Erode and ⛰ Soften modifiers to add some nice detail.
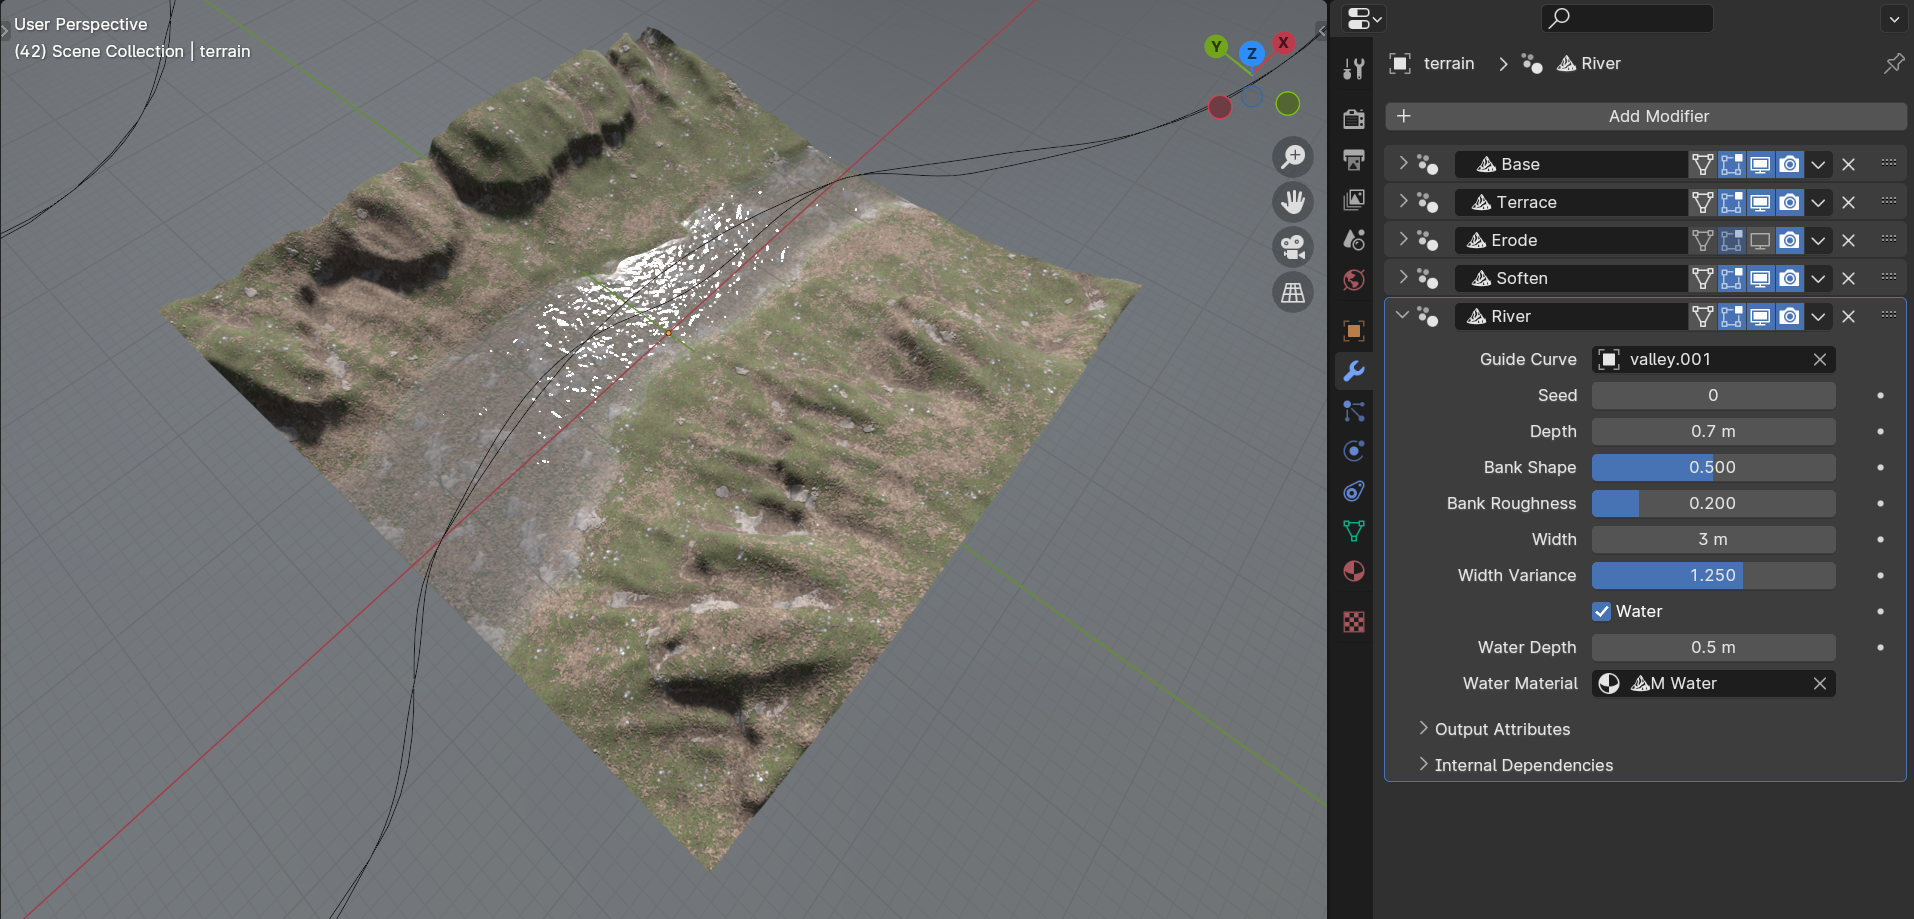
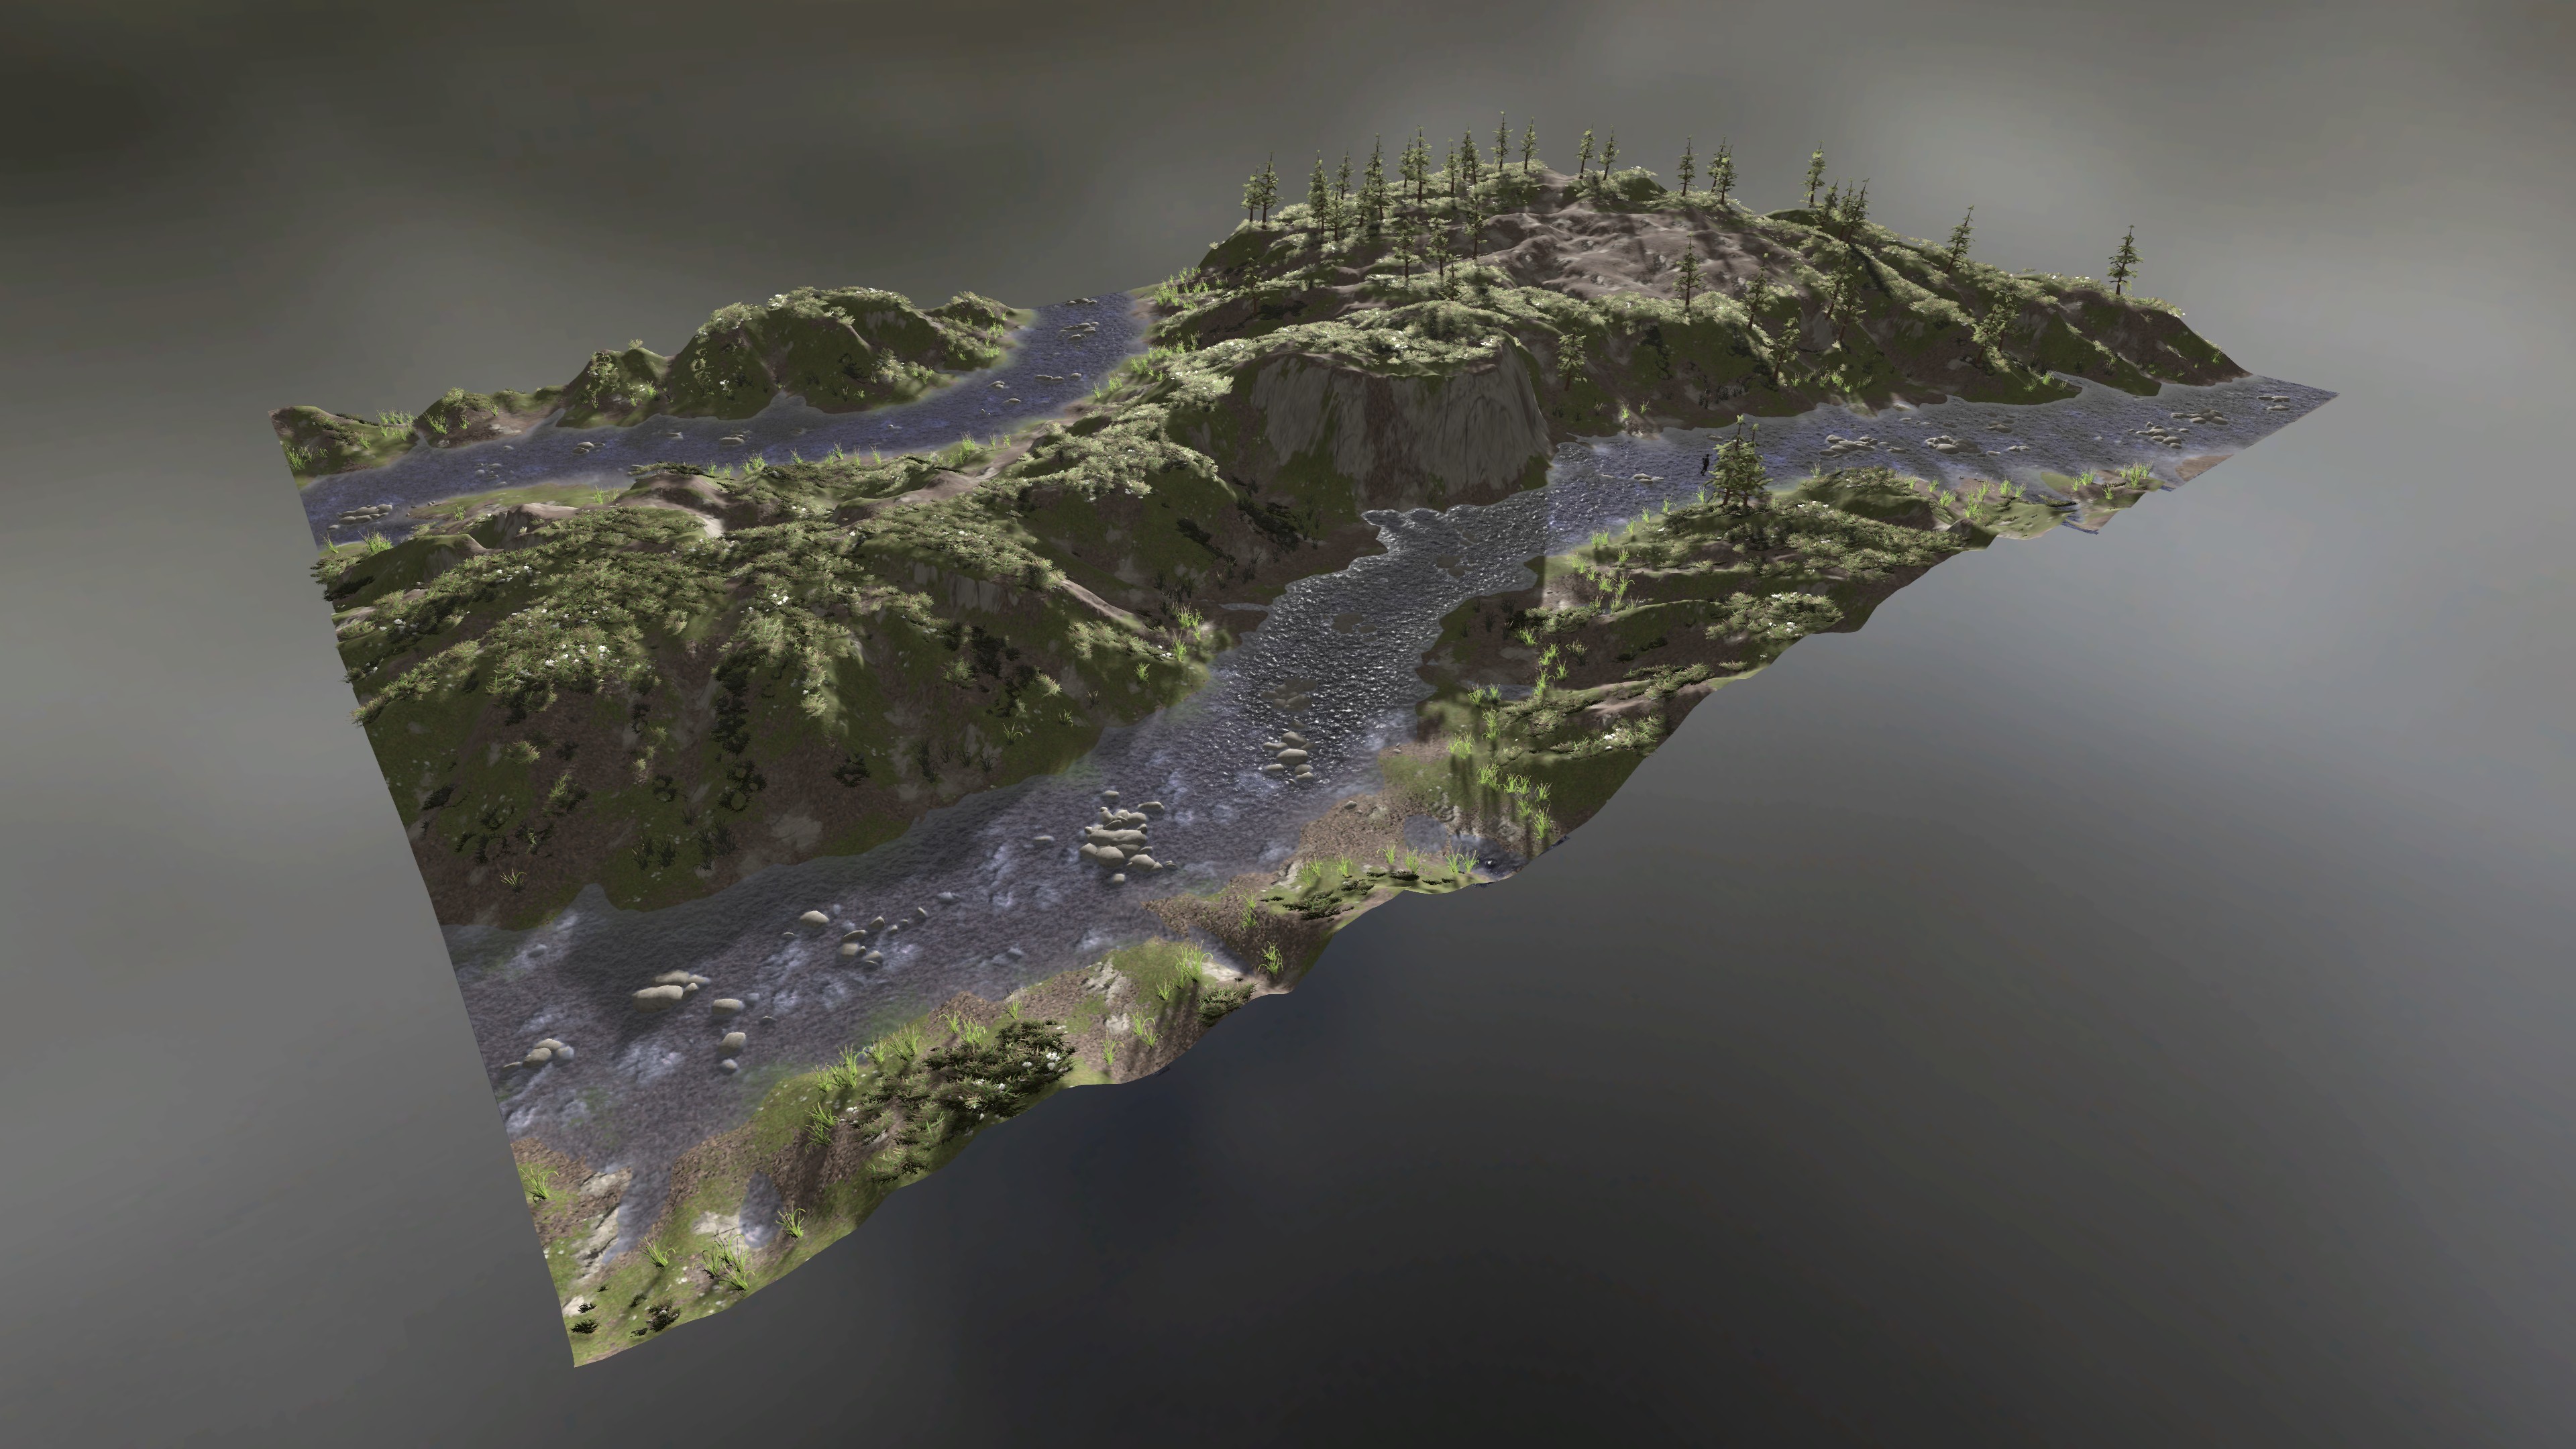
From there, we could add a ⛰ River modifier to give the terrain a nice focal point, and drop a material on it to give us a better idea of the final look.
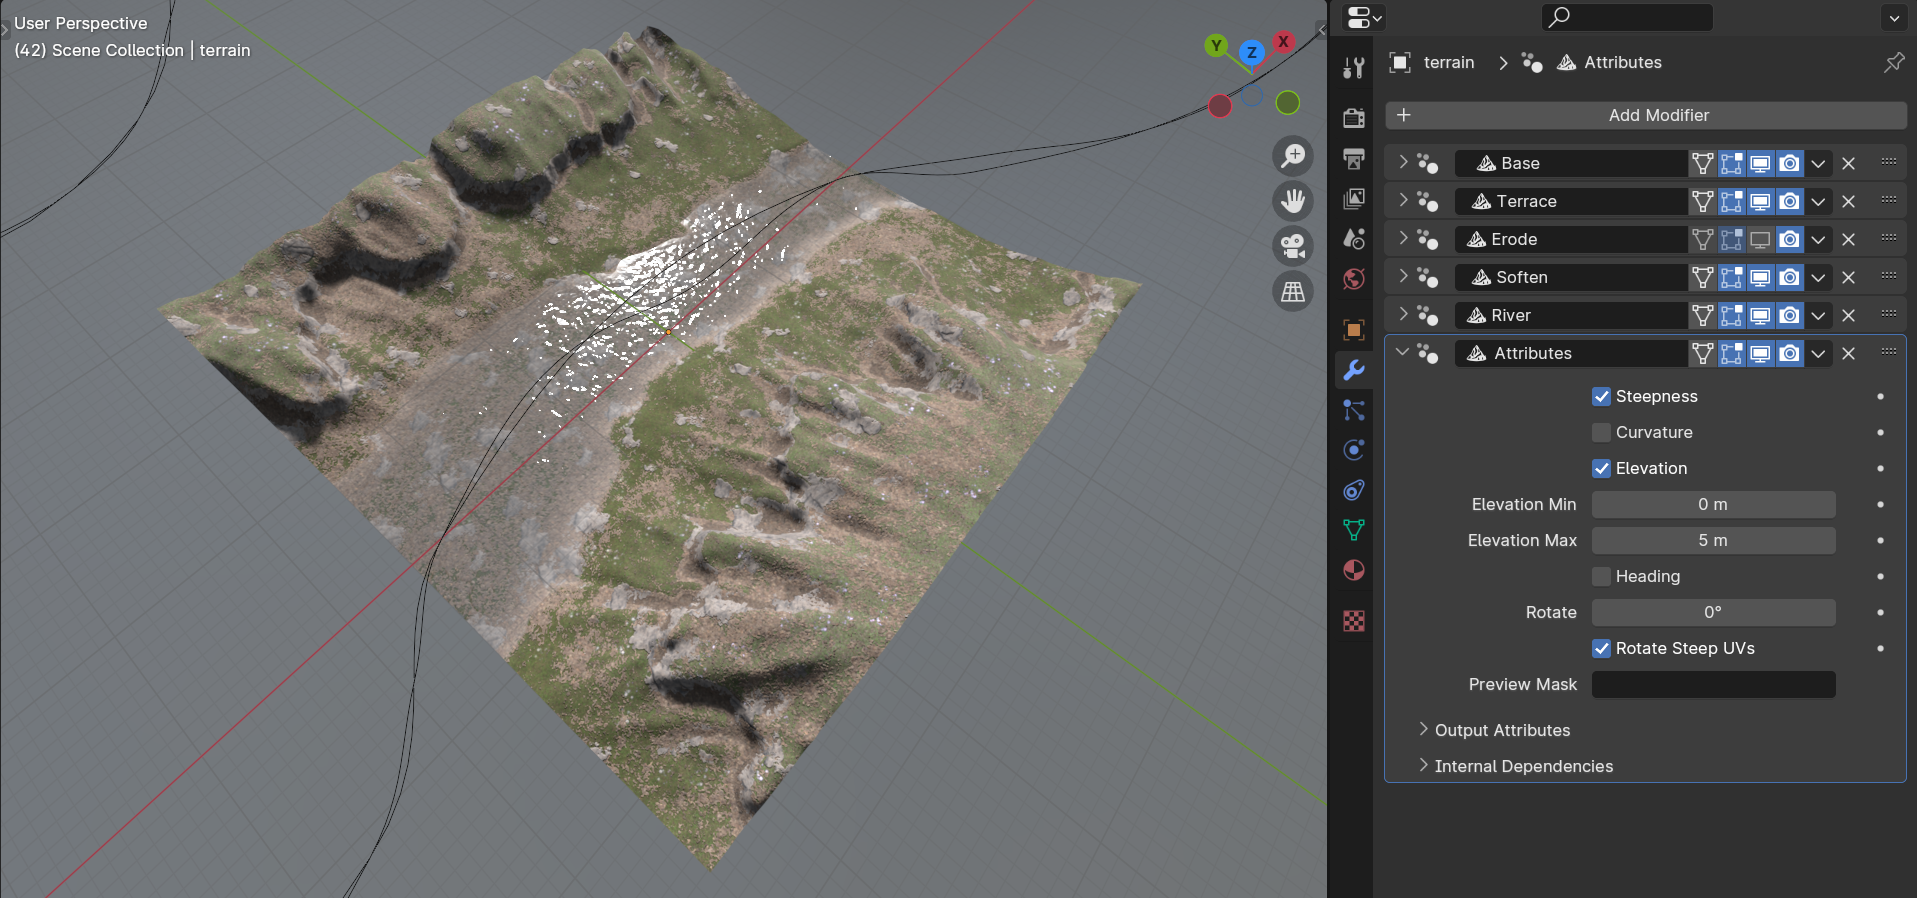
Always add an ⛰ Attributes modifier as the last step, it doesn't make any visual change, but is needed to calculate steepness, etc.
Now that we have a small section of terrain done, we might want to expand it to cover a larger area. One way to do that is to go back to the ⛰ Base modifier, and increase the size parameter. Another way, is to duplicate the terrain object and move it one terrain size over, so that it is adjacent to the original terrain tile.
The tiling feature has proven to be the least understood part of the TerraNode modifiers. Why not just make one big terrain? Doesn't using tiles complicate things for no benefit?
The answer is that you can just make one large terrain, however it may become frustrating to edit due to time wasted waiting on Blender to apply edits to the terrain. The reason the modifiers are tileable, is to allow the work of calculating the terrain result to be divided up into smaller tasks. That, in turn, allows each tile to update quickly as you edit it, without imposing a constraint of a small total size.
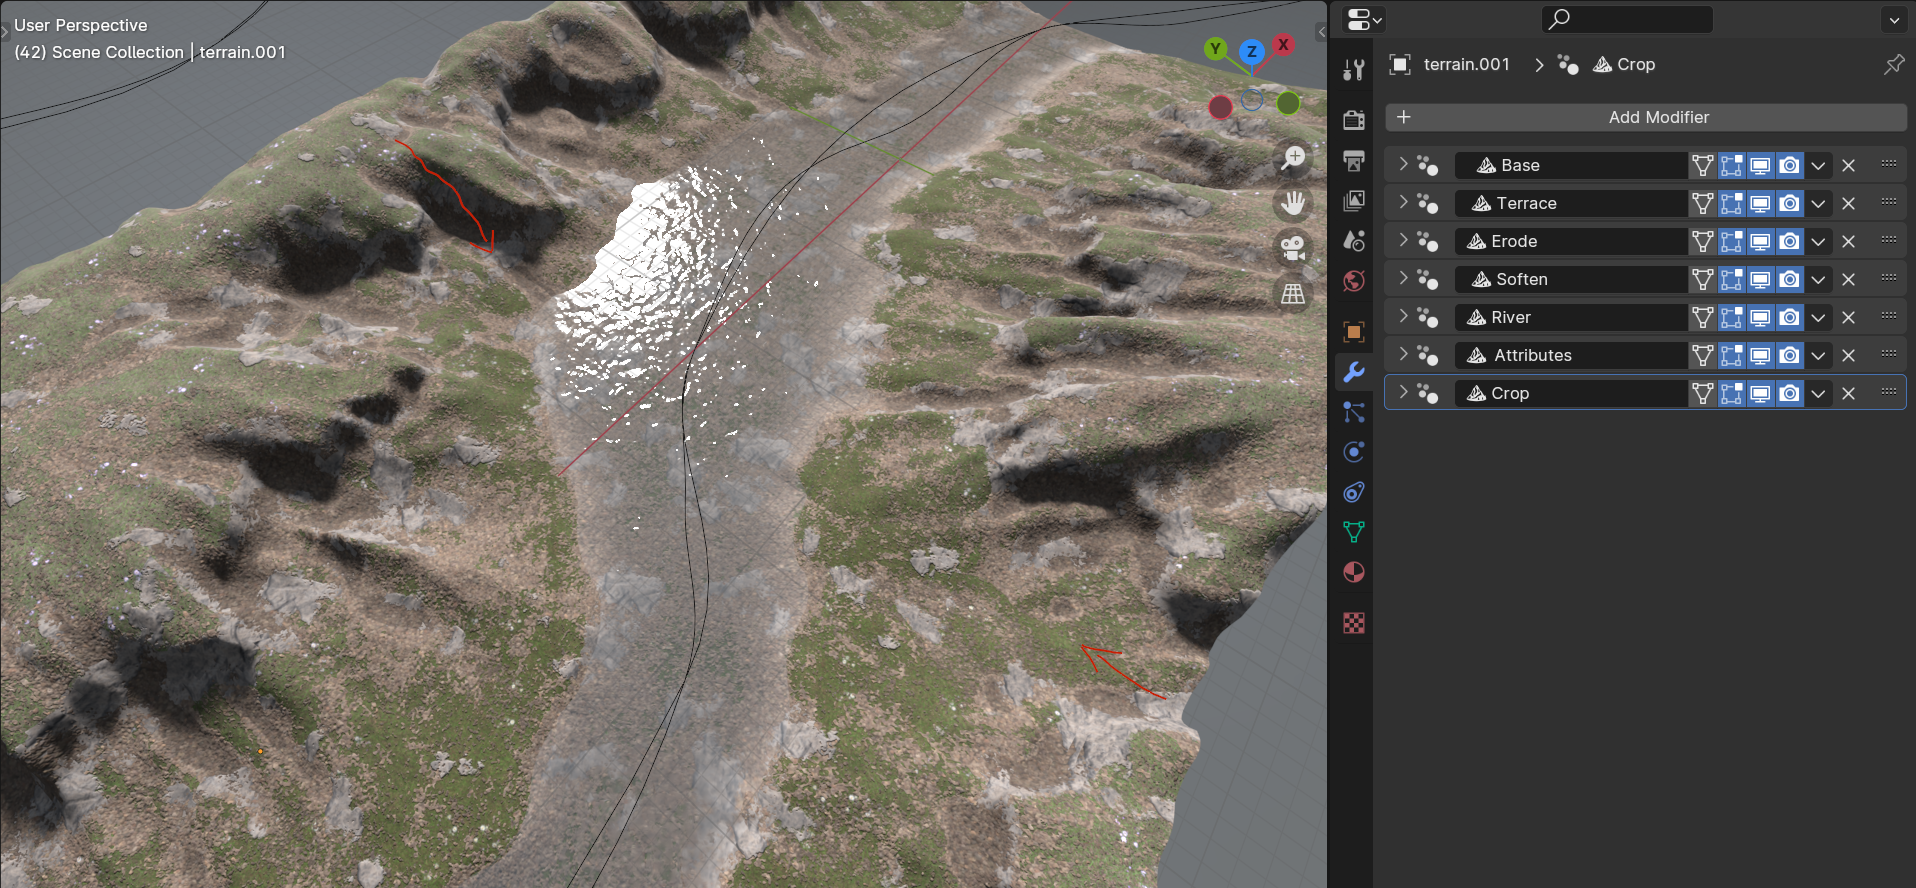
The drawback of using tiles is that the erosion flow calculated on a tile won't match the flows on adjacent tiles, breaking the seamless edges of the tiles. If you do use the tiling feature, there are ways to make seams nearly invisible. That can be achieved by expanding the size of each tile slightly in the ⛰ Base modifier and then adjusting the crop and feather parameters on a ⛰ Crop modifier.
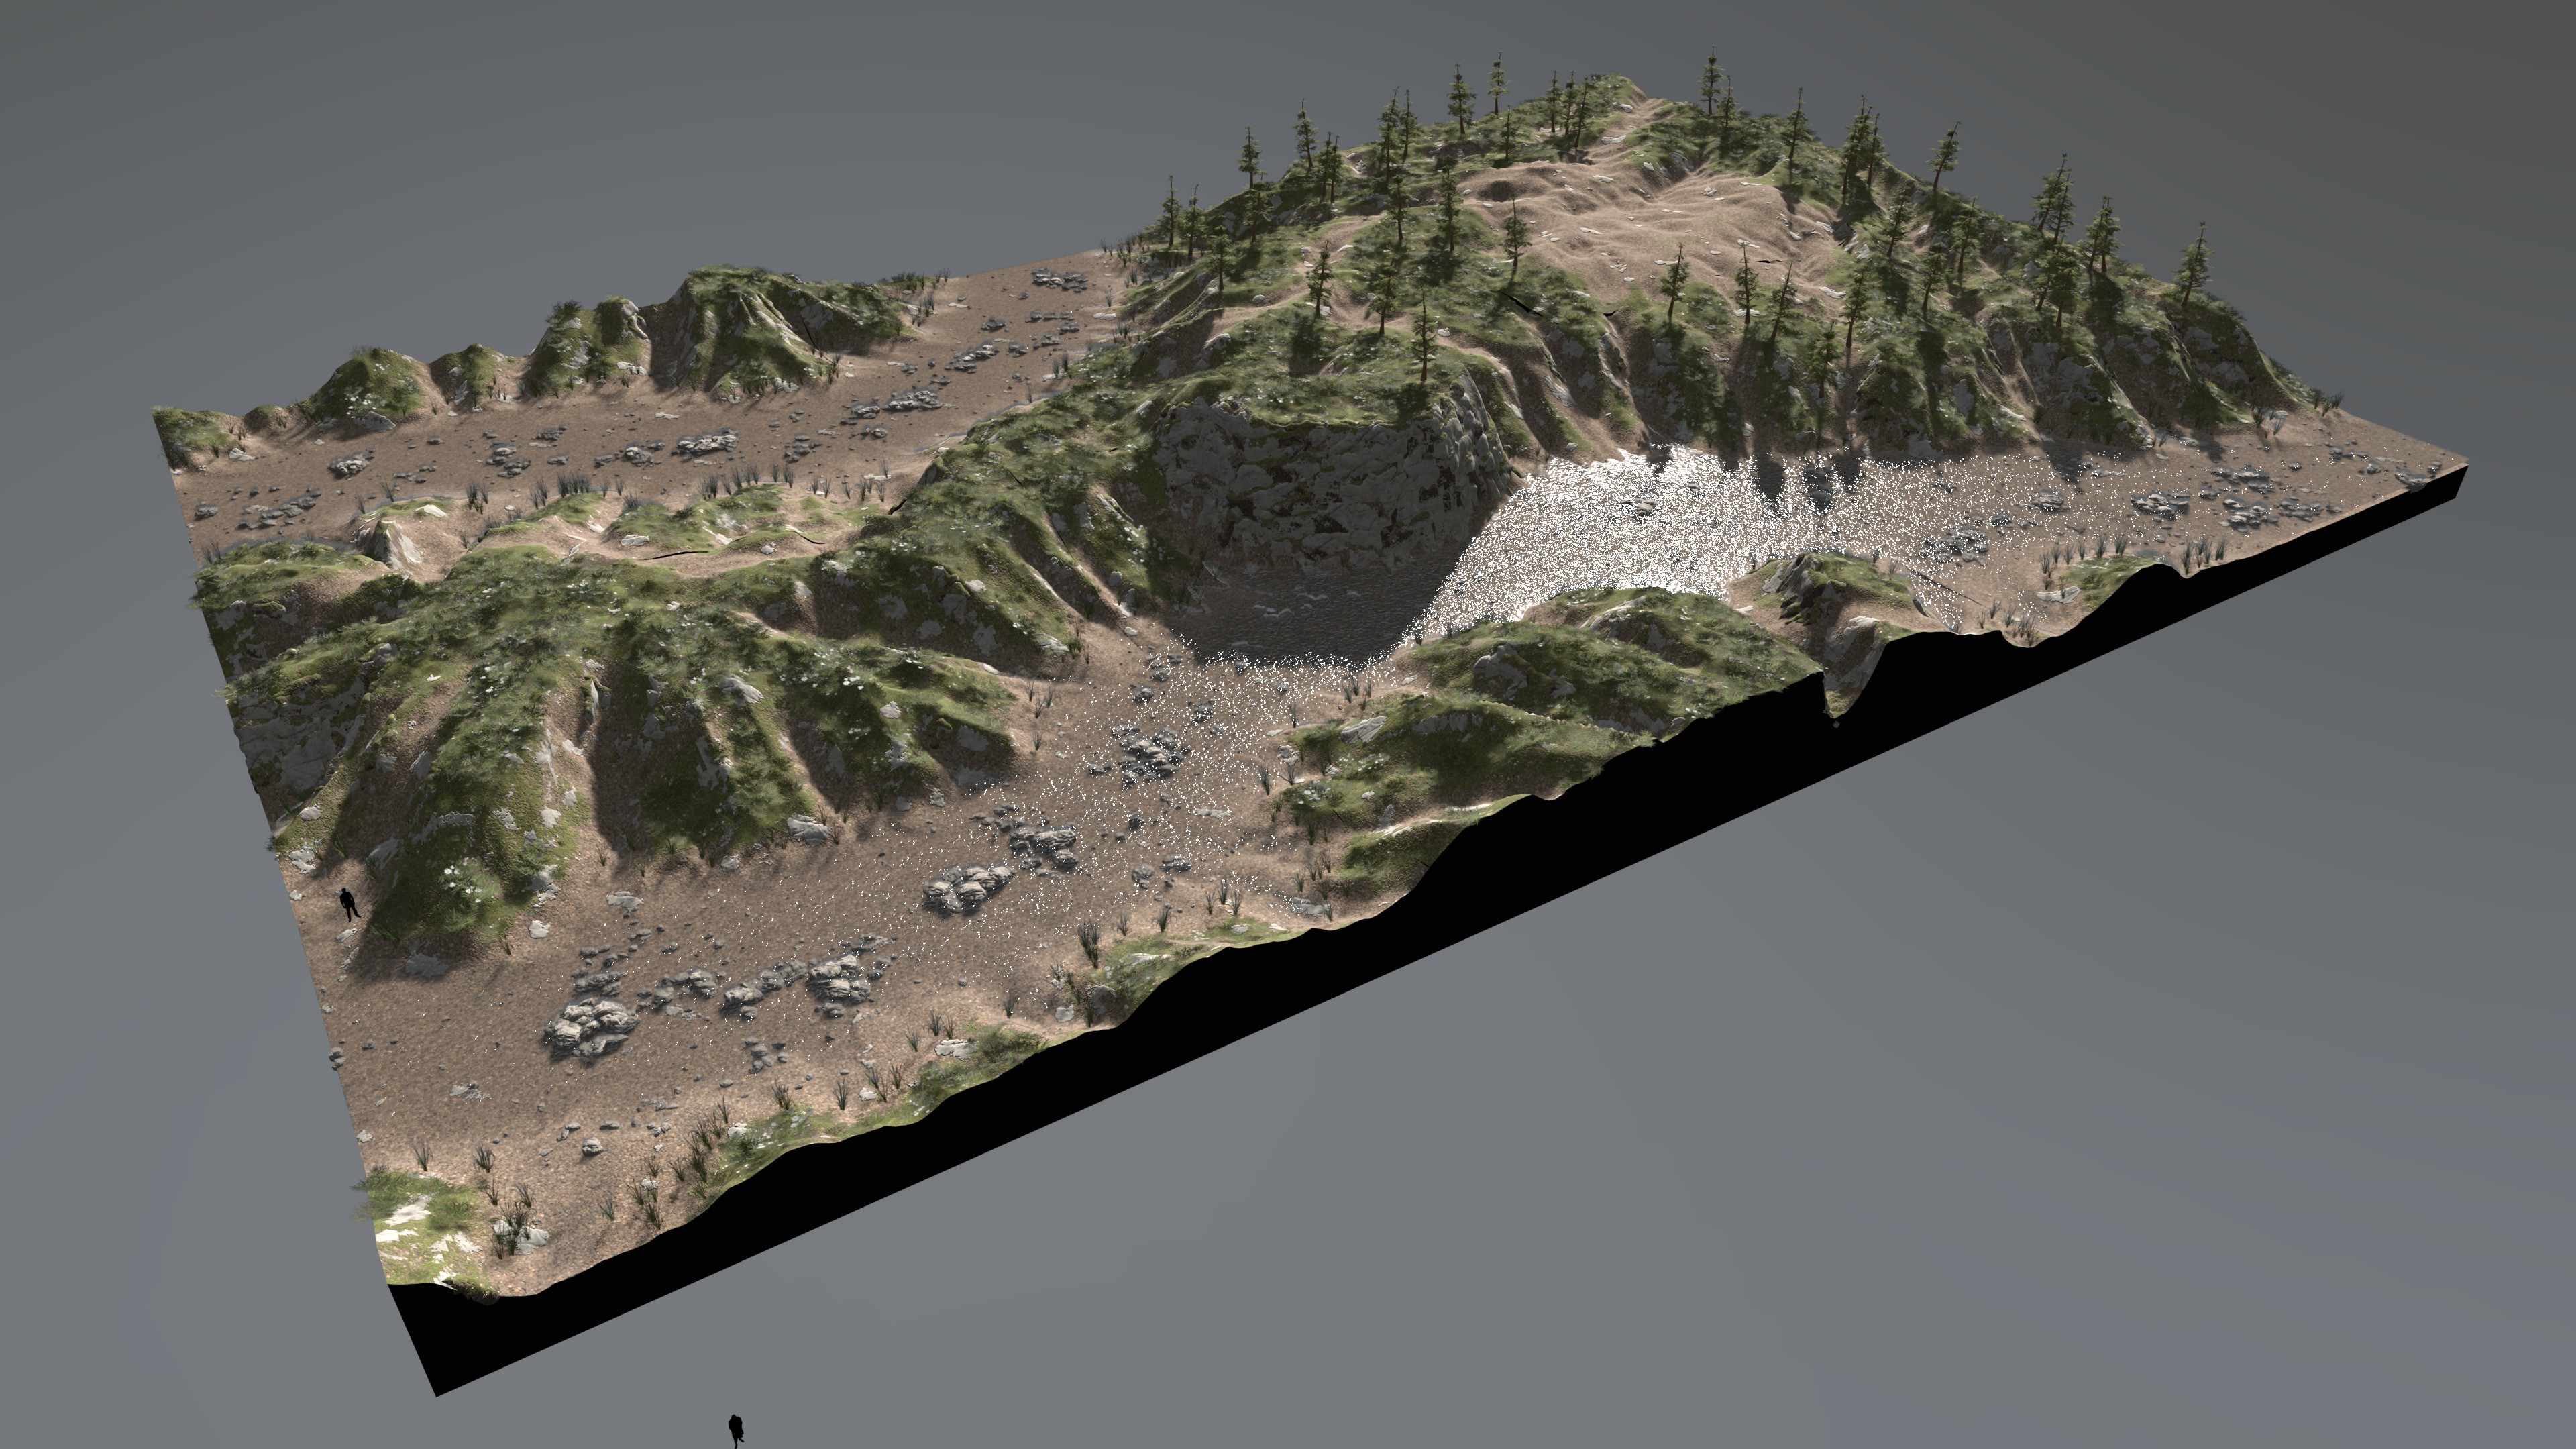
I think the true power of the TerraNode modifiers can be seen if we simply return to the ⛰ Base modifier, adjust the hill steepness and plateau parameters, and then drop a different material on the terrain. With a few edits, you can achieve a completely different result in a matter of seconds.
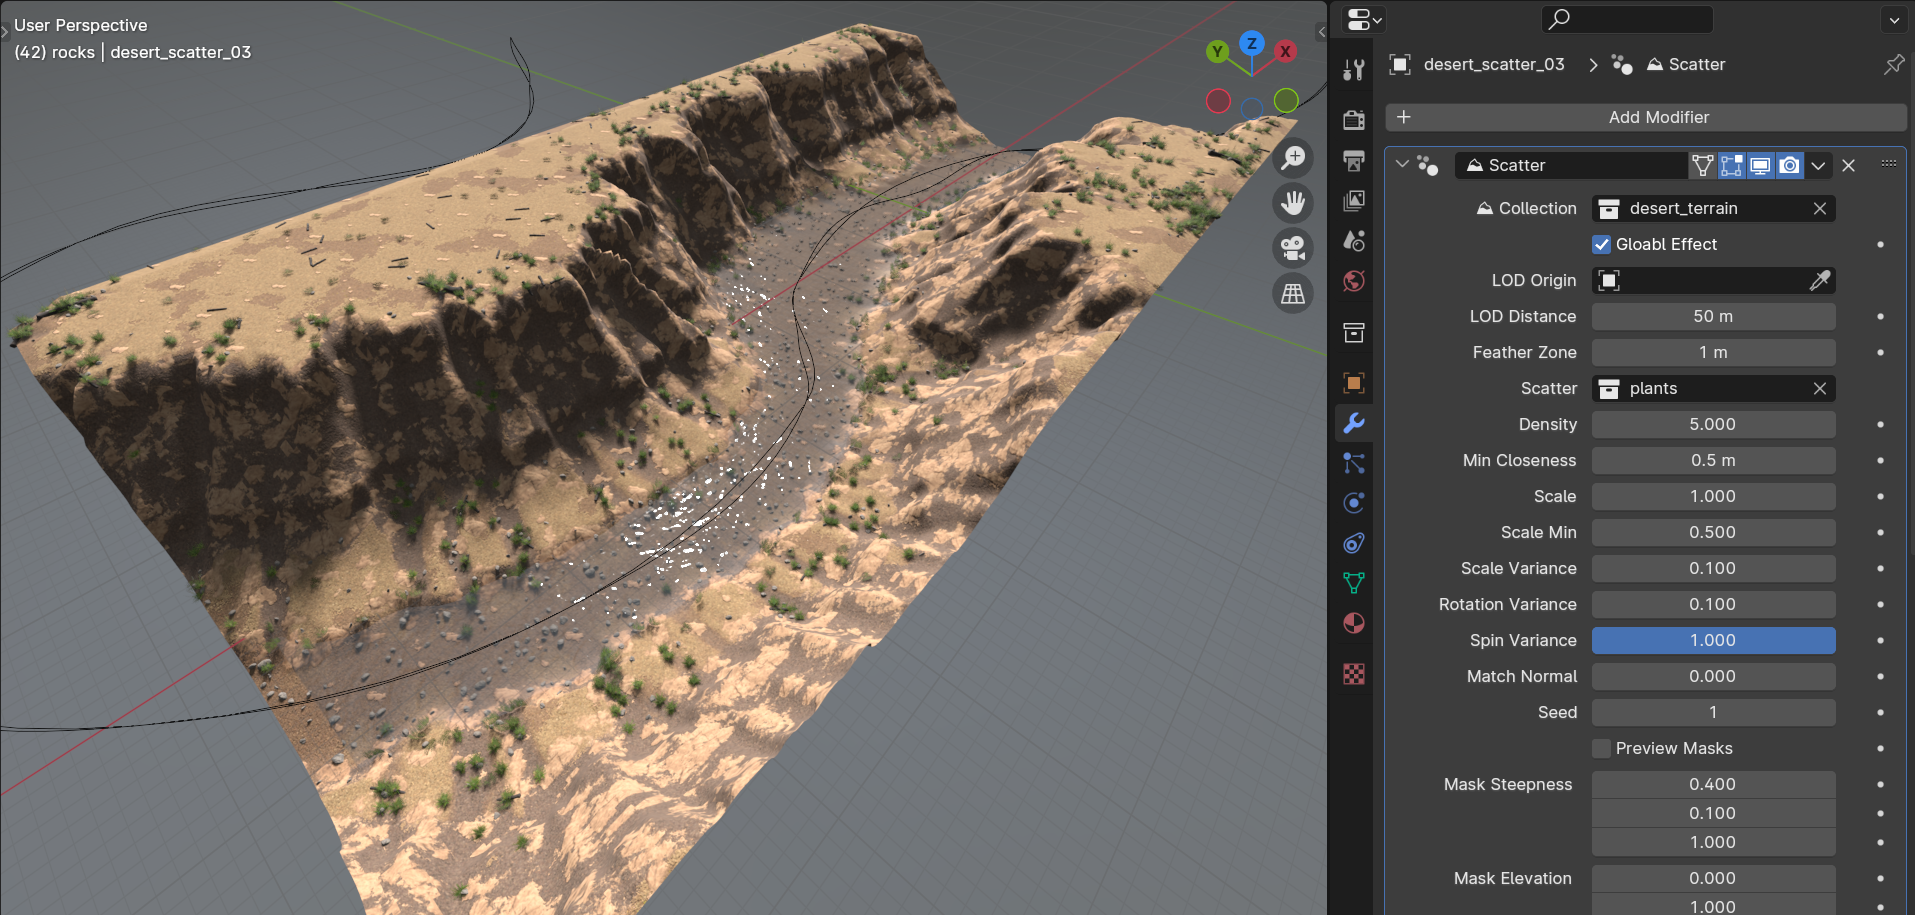
From here we can add several objects with ⛰ Scatter modifiers, to place plants and rocks based on the terrain features, such as steepness, or erosion. (tip: if you drag a scatter preset into your scene from the asset browser, make sure to Clear its Rotation with Alt+R)
And that's the gist of it, beyond that you'll have to experiment with adding the modifiers in a variety of different orders and see what you can make with them.
Modifier Details
click on a modifier for more info
Exporting
the DJH TerraNode addon
Terrain data can be exported as height and attribute maps using the included addon. The addon lives in the 'N' panel of the 3d viewport under the 'DJH' tab.
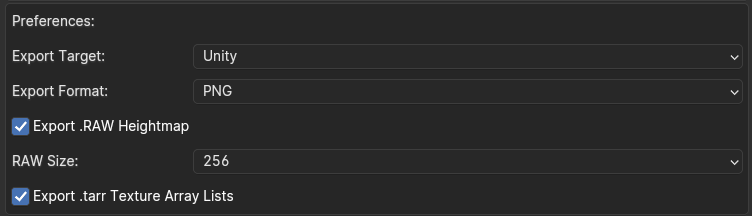
First, there are preferences that you should set globally under the user preferences:
Export Target: If you're exporting to Unity or Unreal, select that here.
Export Format: What kind of images should the addon save. (16bits/pixel)
Export .RAW Heightmap: Some game engines can only import single channel .RAW heightmaps.
Raw Size: Resolution of the above heightmap.
Export .tarr Texture Array Lists: Will save text files containing the names of all exported textures of the same type (Not generally useful, I wrote a script for Unity to import the .tarr file as a texture array).
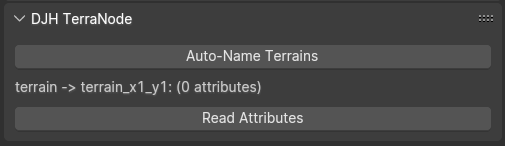
By default, the addon simply instructs you to select a TerraNode terrain. A terrain selection is detected by looking for a '⛰ Base' modifier on the selected object.
Once a terrain has been selected, a couple of options will appear. Auto-Name Terrains will rename all the terrains in the active object's collection based on their X/Y location. This kind of naming convention is preferred by Unreal and Unity. The line below that is a quick check of what you have selected, it shows you the name of the Collection that the addon will be working in, the name of the selected Terrain, and how many attributes have been loaded. The addon does not load attributes automatically, click Read Attributes whenever you need to update the list.
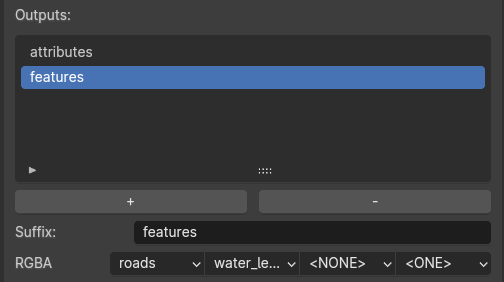
Once you have read the attributes, you will be able to create 'Outputs' each output is one 16bit RGBA image. You can select outputs to edit them, use the plus/minus buttons to add or remove them, and edit the selected output via the suffix and RGBA properties. Suffix is appended to the name of exported images, which will be: ObjectName_Suffix.Extension e.g. terrain_0_1_features.png The RGBA dropdowns let you select what data will be saved in each channel of the exported image. For example in features, we are exporting the roads (red), the rivers (green), nothing in (blue), and white (alpha).
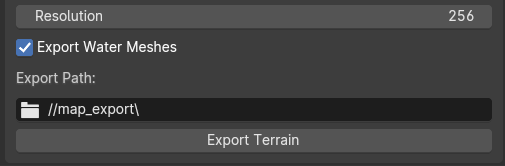
At the bottom of the panel, you can choose the resolution of the exported images, note that there is no benefit to choosing a resolution larger than the vertex resolution of the terrain mesh. Enabling the 'Export Water Meshes' option will have the exporter save .FBX files for each of the terrain tiles, containing only the water surface. Finally, you can choose a folder where you want the exported data to be saved. This can either be a relative path, or you can copy/paste a directory path from your file browser.
Importing the resulting data into another program is a whole other process, which I won't go into here. But I have tested it, and can confirm that it can be done for both Unity and Unreal.