This page contains a summary of things I have made.
You can click on the menu tabs to see overviews of the different tools.
Thanks for stopping by! Please have a look around.
Petrify is a library of tools designed to help you make rocks. Whether you want a bunch of small rocks to scatter across your scene, a few large rocks to feature in a landscape, or one 'hero' rock to sculpt on, the Petrify library should have some tools that will help you.
The backbone of Petrify is a set of Modular Geometry Node Modifiers, these modifiers are tools to help you make rock shapes in a procedural way. Beyond the shape, there are tools to help with shading and materials, sets of textures to layer up detail across the surface, brushes for sculpting, and presets for ease of use or to learn from.
Do you ever add ropes, chains, wires, or other long thin and flexible objects to your scenes? Strands is a GeoNode Asset Library, containing a set of modular modifiers to help you do exactly that. The modifiers assist with placing curves in your scene, appending additional details to them, and meshing those curves into ropes, braids, or chains.
If you want a low-poly rope, far from the camera, it can do that, if you want to get a little closer, render individual strands, it can do that too, or if you want to place the camera mere inches away from the rope, add a fuzz modifier, it can do that too. Flexibility was prioritized so that you can choose which tools you want to use that make sense in your scene.
There are many ways to use the modifiers that come in the Strands library, which modifiers you use and how you combine them together will depend entirely on what you are trying to make. There are modifiers for placing curves in a scene, filters to edit those curves, options for adding additional elements along the curves, and modifiers that turn curves into meshes that you can render.
When making terrain, I often want to place details where I find them important, but I usually do not want to take the time to sculpt every little mound and rivulet . . . To marry those two contradictory facts, I made these terrain tools.
The modifiers make the whole terrain creation process procedural, from adding the base grid to capturing the final attributes. The procedural workflow allows you to take your terrain to a near-finished state, decide that a river is too narrow, easily go back, edit the width, re-enable some modifiers and, painlessly get an updated terrain with a wider river.
The terrain can be 'sculpted' with a set of guide curves and surfaces which are separate objects that I think of as controls. The controls allow you to place features, such as valleys, roads, rivers, clearings, and hills where you want them.
Then there are modifiers to apply effects to the terrain, I think of these as filters. Filters automate the addition of finer details with modifiers such as; noise, soften, fill, erode, etc.
To tidy everything up, you can add a crop modifier to trim and add side walls, and an attributes node to capture all the information you might want in a material or to control where plants and debris are scattered.
Scatter modifiers are added to separate objects from the terrain base. They can scatter instances across the entire terrain collection or in a zone defined by its surface. The scatter modifier can also mask out portions of the terrain using terrain attributes, such as steepness, erosion, elevation, or water.
Almost all of the modifiers have been designed so that an adjacent terrain tile will continue 'seamlessly' (Generally, the seams are hard to spot, but they aren't always perfect) The ability to divide the terrain into tiles allows for larger terrains, which can be edited in sections, and enabled and disabled as needed to keep the editor interactive. A whole stack of modifiers can be 'bypassed' by disabling the terrain base modifier, and you can set a different resolution per tile for lower polycounts on distant tiles.
Since their addition to Blender I have been gradually making and incorporating procedural tools into my workflows. With the addition of the Asset Browser and Geometry Node Assets, --and mostly to end the endless pain of browsing and appending--I began organizing my best nodes into an asset collection. This project is the result of that effort and currently contains 75 modifiers/nodes that are generally aimed at reusability and versatility.
The modifiers range from simple deformers and selectors, to complex wall and tree generators. Due to my interest in Tech-Art for games, most of my modifiers also create exportable UVs and avoid solutions that require high poly counts.
A few highlights are, the 'Build Nodes' a modular set of modifiers for making walls, roofs, and other architectural elements. The 'Fence Modifiers' six modifiers that can be added and stacked in any order on a curve to create hundreds of fence variations. And the array/deform modifiers for generically copying things in all sorts of directions with better UV control.
Because I got fed up with manually setting up each bake, editing dozens of settings, painstakingly selecting objects, baking each map separately, saving each image, and fifty other frustrations, I made DJH Bake Batcher. An addon that makes baking standard PBR assets feel more like pressing F12 to render a scene, and less like a marathon of details. Bake Batcher removes headaches by sacrificing the flexibility of customizing a ton of settings, for the speed and convenience of baking in a single click.
I have developed two addons, initially for my own use, that function as a bridges between Blender and Unity. I was motivated to create them because between the FBX exporter in Blender and FBX importer in Unity, I have spent far too much time tweaking settings and browsing to save locations.
The BAsset Tools are my attempt to develop a method of exporting node groups or objects with linked mesh data from Blender without having to 'bake' or 'freeze' the result into a mesh. A BAsset file contains a list of instance names and transforms, which are imported into Unity as a standard prefab. The goal was to create a powerful workflow that can take advantage of Blender's tools for placing objects and then export the result to Unity with a single click.
Similarly, the BAnim Tools streamline the process of exporting animations from Blender to Unity so that time doesn't have to be wasted worrying about technical details or fiddling with settings. I wanted to maintain full creative control over the animations, while also providing a set of tools to simplify my animation workflow and reduce iteration times.
I have a very long and cluttered addon for Blender where I test out all my crazy ideas, many of those are incomplete or too specific to be generally useful, but some of them have become a standard part of my workflow and I have separated some of them into a more polished--if equally eclectic--addon.
DJH Utils adds a handful of operators that you can call from the search menu, add to quick favorites, or create hotkeys for.
In 2023 I started the LooseEdges channel on YouTube to attract attention to my tools and also to share some of the knowledge that I have accumulated over the years.
On the channel there are a variety of different videos. There is a series with my thoughts about Getting Started if you're new to Geometry Nodes.
Quite a few videos have a focus on Geometry Nodes, but there are also some that focus more on workflows and general tips.
I have also uploaded a number of videos about some kind of experimental Geometry Node setup, where I have also shared the .blend file from that experiment. You can check those out below.
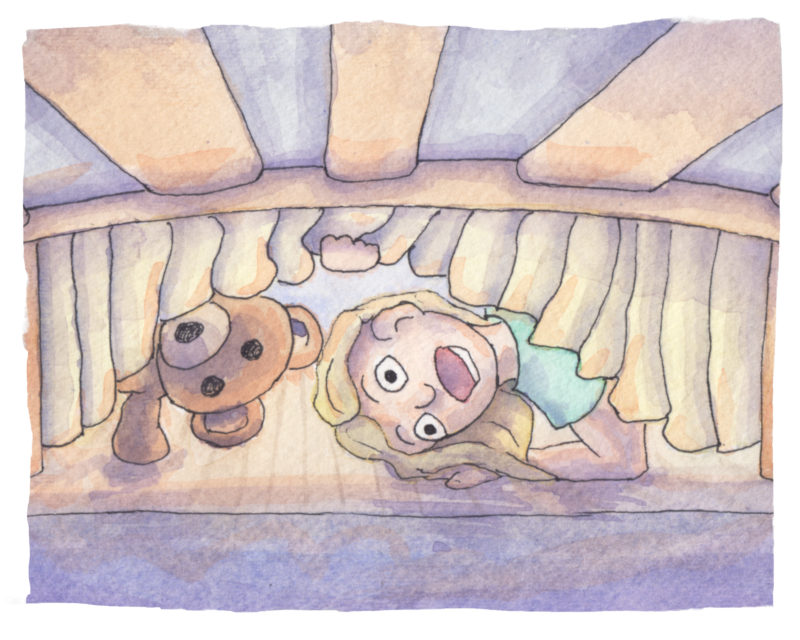
In 2024 I finished writing a little story that I'd been working on in my spare time and since I wanted bit of a change of pace. I decided to sit down, illustrate the whole thing, and figure out how to publish it.
I learned a lot, about watercolors, layout, the publishing process and a host of other things.
In the end, I had made a little illustrated book that I am very proud of.
For as long as I can remember I've loved to make things; from sand castles to lego to model kits. After watching the documentary features for the Lord of the Rings, I though miniatures were the coolest thing ever. For a time I dreamed of being a filmmaker and started doing videography for weddings and some short videos.
I first downloaded blender in 2008 and started learning how to use it, the freedom to create anything you can imagine is enticing but hard to achieve. In 2013 I wrote my first computer program and got a job working for a handyman, building and fixing things in the real world.
About 2016, feeling pretty good about my Blender skills and having built up some confidence in programming, I dove into the Unity game engine...my interests of telling stories, building things, and programming were converging.
For several years progress felt very slow, life got in the way, incomplete projects began to pile up, but I was learning.
At the end of 2021, I began work on a new game project. The idea was clearly defined, and the scope felt manageable...just don't ask me about the scope now.
In 2023, I decided some of the tools that I'd made for that project were pretty cool and that I should organize them into a product I could sell, this site, my geo-nodes, addons, and YouTube channel are the result of that decision.
Thanks for stopping by...we've much farther to go,
-Daniel
If you are interested in hiring me either to make something for you or as a tutor or consultant, I would love to help you. Feel free to email me at the address above.
My standard rate is $55/Hour.